I used the Jan 5th sketch from Sketchy Thursdays for this layout. I loved the simplicity of the sketch. It worked so well with this photo of a plane trip I took in the summer of 2010.
This sketch was also the day 4 sketch for the Sketch-a-thon at Memorable Seasons.
Cardstock: Bazzill
Patterned Paper: Little Yellow Bicycle - Sweet Summertime, Aqua Dot
Jillibean Soup - Pasta Fagioli, Blended Beans
Sticker (Itinerary) Making Memories
(Life is Good) Bella Blvd
Transparent Tag: Meking Memories
Journaling Card: Best Creation Inc - Travel Forever
Rub-on: October Afternoon -Boarding Pass
Chipboard Thickers: American Crafts -Rocketeer
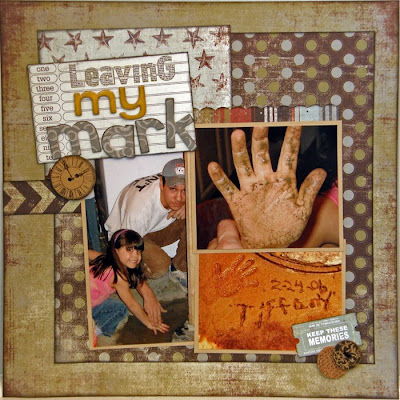
This layout was also based on a sketch from Sketchy Thursdays it was the Dec 29th sketch. Which I had done but forgot to photograph by the deadline. Oh well I'm posting it now anyways, besides the photos are almost 6 years old. On the "Mark" alphas they were plain chipboard letters that I stamped with Grey paint.
Papers: Scrap within Reach, My Mind's Eye
Ticket: My Mind's Eye
Buttons: Graphic 45
Cork: Pink Paislee
Stamp: Gel-a-tins
Alphas: Studio Calico, My Little Shoebox, Maya Road
Ink & Paint
Wednesday, January 11, 2012
Friday, January 6, 2012
New DT GIG
New DT GIG!!
I'm so excited to announce that I'm a FITgirl now!!! I made the DT over at Scrap Fit!!!
Its a great group of talented ladies and I'm honored to be part of the team. I'm very excited and can't wait for the new challenge in Feb!!
I also completed this layout at the end of December and not sure why I keep forgetting to post it. Its sketch #61 from sketchabilities. Cameron was soooo excited for this day, because you get to be first in line for lunch.
Closeup
Closeup
Wednesday, January 4, 2012
Create: Blog plus a Sketch-a-thon
Create: Blog
The challenge this week over at the Create: Blog was to create a card with vellum. Yep vellum, you know the stuff you probably haven't used in 2-3 years. I started working on this challenge right away. I decided I would emboss the vellum with a Spellbinders Impressabilities Circles die. The Gray patterned paper was an American Crafts piece of scrap. The flourish and journaling spot was from a company that went out of business at least a year ago, the ribbon was from a christmas present that I saved, Prima flowers (I've had for ages), Stamp is Imaginisce.
Winter Wonder Sketch-a-thon
Memorable Seasons is having a sketch-a-thon for the month of January. There will a total of approximately 20 sketches this month. I know that I won't complete them all but I was able to complete sketch #1. It was a great sketch from Liz Chidester.
I also created this layout for a challenge over at My Sketch World. The challenge is called Intitled, and what I did was use an object (the chipboard Santa) to create part of the title.
When I was creating the layout I cut the large circle and then decided I needed something else around the white circle because it was just toooo white. Well the Peppermint pattern is the backside of the white so I decided to take my circle cutter (the Kreaxions Circle Cutter from Just Imagine Crafts) and created a bordered circle. I LOVE how PERFECTLY I was able to cut these circles.
Here is a picture to better illustrate the great cuts this circle cutter makes, plus the small blue tool IS the circle cutter.
This is the first christmas related layout I have created since last February. I pulled out Crate Paper's Peppermint Collection the chipboard Santa was just the perfect touch to use on this layout. The only thing not from Crate Paper is the beautiful ribbon which is Webster's Pages.
Monday, January 2, 2012
Top 10 List
Goodbye 2011 and Hello to 2012! With the start of the new year I always tally up what I created in the past year to see how much I created. Well 2011 was the least productive year I have had since keeping track in 2008. My totals are 144 layouts, 57 cards plus 1 Mini Album, an Altered Bottle and an Altered Xmas Tree.
But with the look back I also want to showcase my top 10 layouts I created this past year, in no particular order.
1.
2.
3.
4.
5.
6.
7.
8.
9.
10.
But with the look back I also want to showcase my top 10 layouts I created this past year, in no particular order.
1.
2.
3.
4.
5.
6.
7.
8.
9.
10.
Sunday, January 1, 2012
Happy New Year!!
Hope everyone has a wonderful New Year!! Here is wishing 2012 is a great one!!
Now on to the January challenge over at True XOXO Scrapbooking. The Challenge this month was the number 1. Here is my One layout,
I have one Patterned paper, transparency, doily, mist, felt swirl, sticker, metal snowflake, border, ribbon, rubon, paper clip, flag, chipboard snowflake, button, one word title, ticket, pearl, journaling spot, tag, snowflake, baker's twine, and brad.
Closeup -You can see how I added the baker's twine to the snowflake.
Closeup -You can see how I added the baker's twine to the snowflake.
Tuesday, December 27, 2011
Two TaDa Creative Studios Projects
We had a great Christmas, spent time with family and friends, the kids loved the stuff they received but there is one holiday story that I just have to share. We open our presents on Christmas Eve we always have well after dinner we started to open presents when there was a knock at the front door and to EVERYONE'S surprise Santa Claus was on our doorsteps. Hubby invited him inside, the kids didn't know what to do they were sooooo surprised they wouldn't move. Finally I got them to go by the door and get a picture with Santa.
Then Santa handed us a cookie jar filled with cookies, wait aren't WE supposed to leave Santa cookies. Oh well it was a terrific surprise, thanks SANTA!! By the way the hat my daughter is wearing is a christmas present she had just opened and she loved it and barely took it off for the next 24 hours.
I pulled out the Bountiful Blooms collection from TaDa Creative Studios to create this card. Papers used Ivy League, Mini Mes and Snippets & Clippets. Stamped a sentiment on the Journaling block added rhinestones to the flowers added stitching and used a Spellbinders Large Classic Inverted Scalloped Square on one of the papers.
This card is for the Create:Blog the challenge was to create a new year card. I used another TaDa Creative Studios collection this time the Abode a la Mode collection. I used the Hoop Dee Doo paper for the base of the card, then created a flag from one of the Tag-a-ma-jigs, the purple strip is also from the Tag-a-ma-jig paper and finally created a shaped piece for the sentiment from the Jumpin' Java paper. Add some stickers and you have an easy New Years card.
Monday, December 19, 2011
Oh Christmas Tree
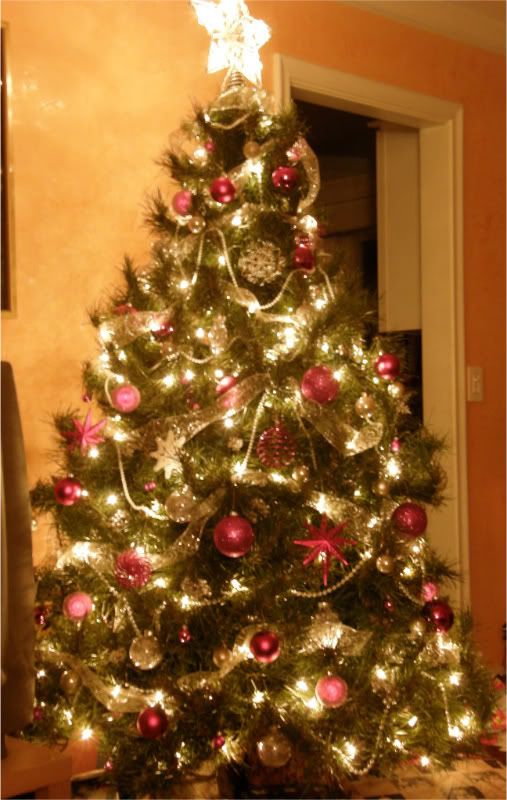
OUR REAL TREE
This year we made a totally different Christmas tree than any tree we have had before. Everything on our tree is new this year, except for the actual tree. We got all new Pink/Purple bulbs, homemade bulbs with ribbon, snowflakes, ribbon and beads, even a new star.
Baker's Twine Christmas Tree After decorating our house this holiday season and moving our real Christmas tree upstairs I decided we needed a small tree downstairs and instead of going to the store and buying something I chose to make one instead. So I bought a styrofoam tree to decorate. At first I thought about using some ribbon but I chose to use Baker's Twine instead. The Green and Red Baker's Twine is Martha Stewart twine. I started with the green roll of twine at the bottom of the tree and used a pin to Temporarily hold the end in place while TIGHTLY wrapping the tree, after wrapping then I went back and glued the twine to the tree. I stopped when that roll was empty and then switched to the red. However I wanted a border between the twine and decided on the large ball trim in Red and White then the White Sequins on top of the ball trim to add a touch of sparkle to the tree. I topped the tree with a pretty Prima White Poinsettia.
One last tip: I didn't wrap the Baker's Twine all the way to the bottom of the tree because I didn't want it to unwind off the tree so I added another string of sequin which was the perfect finishing touch. Its a very easy project its just a little time consuming because if you don't wrap the twine very tight you will see the styrofoam tree beneath.
Closeup of the ball trim and white sequin's on top.
Closeup of the Prima Poinsettia, isn't it sooo pretty.
A side view of the top of the tree showing how I attached the flower to the tree. Insert a decorative pin to the top of the tree and attach a glue dot to the pin and the flower finishes the tree and doesn't mess up all the hard work of winding the Baker's Twine. I punched a 1" circle to cover the top and added some rhinestones to the top, you only see it from the side but I wanted it to be finished from all sides.
I hope you enjoyed my Baker's Twine Styrofoam Christmas Tree. Hope everyone has a Merry Christmas!!
Lisa
Subscribe to:
Posts (Atom)


